Thursday, November 20, 2014

Geography and Climate

Hello Ladies and Gentlemen! Sorry, I am away sick today :( 

Are you finished yesterday's work? Then please follow these instructions:


Watch the following Video and Answer these questions on lined paper. The video is only 4 minutes long so if you don't catch the answers the first time watch it again:


During the video

1. How many main climate zones does the earth have?

2. Where are two places listed in the video with harsh climates?

3. What are the reasons we can now live in theses very hot or very cold places?

4. What are two ways we track weather with technology?

After the video

1. In the video they said, Some of the first human communities occurred in places with HOSPITABLE climates. What does hospitable mean?

2. List the 6 Main Climate Zones on Earth. 6 Main Zones

3. Name and describe one of the Earth's Main Climate Zones where you would want to live.

4. What country would you live in if you were in that climate zone? Use this map to help.

Click here for Map of Climate Zones


Wednesday, November 27, 2013

Exposure Detective

Today's challenge is to look at a picture and try to determine what aperture and shutter speed was used. I have given you some tips and clues below to help..

Example:

My Comments: I think this picture is using a fast shutter speed between 1/500 and 1/1000 because the quickly moving subject is frozen.  The background is out of focus so this tells me the aperture is on the larger end, between f2 and f4. You would also need a wide open aperture to get enough light into the camera in such a short time span.

Clues for Shutter Speed:
  • is anything in the picture blurred? Use your judgement and decide it blurred because a very long exposure like 8 seconds or blurred because the subject is moving extremely quickly? In the case of fast objects blur can be captured at even 1/100 second exposures.
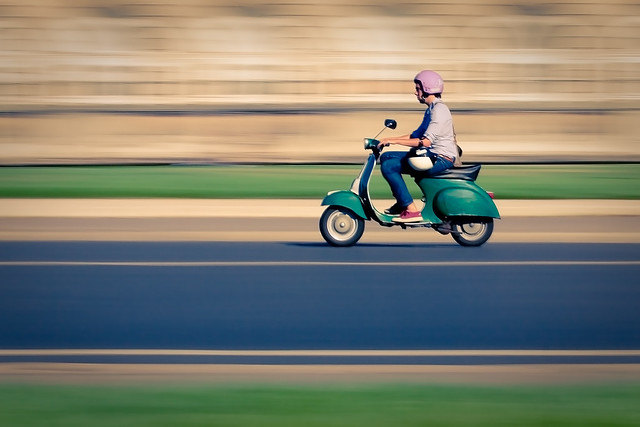
  • is their a panning effect? Chances are good you have a slow exposure .
  •  is the subject frozen in a way that would normally happen to quickly to see? A very fast (1/500 -1/1000) exposure was probably used.
Clues for Aperture Settings:
  •  is there a shallow depth of field ? (An out of focus background?) This is a clue that a large aperture ex: f2.8 was used.
  •  Is everything near and far in focus? The opposite is true.
Overall Clues:
  • Pay attention to the light. If the picture has an obvious high shutter speed and is nice and bright this means that the aperture must have been wide open.
  • Remember your own experiments, what settings did you use?
Your Challenge
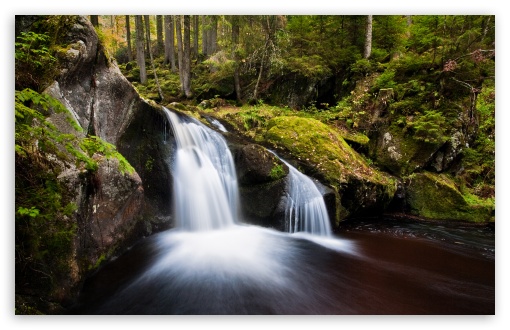
Respond by telling me what approximate settings you think were used for each of the following pictures. Please type and submit your responses. (Support with evidence!)
#1
#2


#3


#4

Monday, January 14, 2013

Grade 12 Project: Photos That Make People Think

As a last in class assignment you will but manipulating one of your photos using the "Rasterbator" program. This software takes an image and rasterizes it (Think Lichtenstein Pop Art) so that it can be blown up to a much larger size.

The focus of this assignment is to draw attention to an issue you feel needs to be highlighted in a social setting. Examples of locations include: the school, inside or out, streets in Grimsby (only with permission of property owners) the library,  and other public buildings. the image is blown up and printed on paper, cut out and put up on a backing. Remember you are not limited to walls, think about using 3-D surfaces as well (Ex: a park bench) The image must be your own. To "hand-in" take a photo of your installation "in situ" and post it on your blog along with an explanation of your intent. Posts must be made before midnight on Friday.


Grade 11: Hue and Saturation Assignment

Grade 11s,  your final in class assignment is based on the lesson we did in class today on using the Hue Saturation editing options in Photoshop. The assignment is very straightforward in the editing sense. It will be marked with emphasis on the creative and artistic effect you achieve. 

The assignment is to take a photograph over the weekend or during Monday's class that you intend to edit for colour. The edit must do one of the following things but only one:
  • Desaturate all colours in the image except for one. This will result in the a black and white image with only  (for example red ) tones showing  through. Ex:


  • Isolate one part of the picture with a selection tool, feather and leave only this in colour. Note the difference in the effect.

  • OR you can isolate part of an image and play with altering the colour in an interesting way. Ex:
You will be graded on the quality of your original image as well as the overall effect of the edits. Pictures that have poor composition or colour edits that appear to be random or without purpose will lose marks.

    Thursday, December 13, 2012

    Student Gallery

    Some amazing work from recent journals....


    Hanna DeRoche
    Larissa Downs
    Taylor Vincent
    Nesta Cooper

    Wednesday, December 12, 2012

    Journal 9 and Grade 12 3-D Assignment

    Grade 11 Journal 9 "Pareidolia"
    "There is an universal tendency among mankind to conceive all beings like themselves, and to transfer to every object, those qualities, with which they are familiarly acquainted, and of which they are intimately conscious. We find human faces in the moon, armies in the clouds; and by a natural propensity, if not corrected by experience and reflection, ascribe malice or good- will to every thing, that hurts or pleases us." --David Hume


    This weeks assignment is to see faces in inaniamate objects. On one level it is kind of a silly fun assignment on another level it is about seeing negative space in a new way and looking closely at the world around you.

    Grade 12 Journal 9 and 3-D Assignment
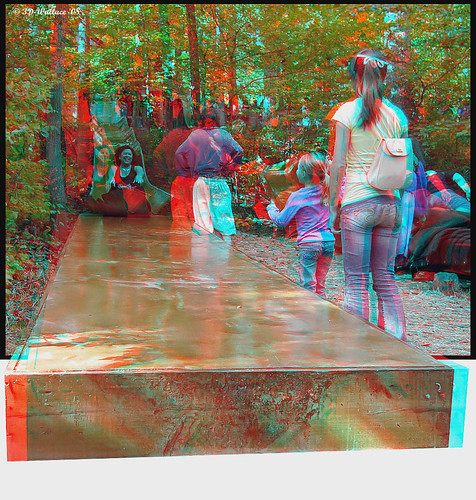
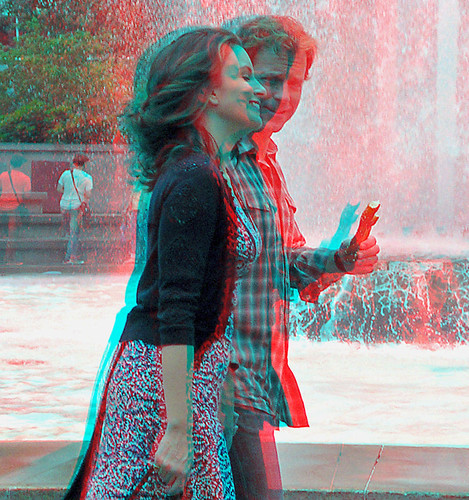
    Part one of your assignment will also be your journal for this week. I would like you to take several photos that will create an interesting 3-D image. Subject matter should have a number of "layers" ie: objects in the for, middle and background. It also helps to have a focal point which stands out clearly from the background. 
    Examples:
    To take the photos you must take a left and a right eye photograph. The photos above were taken with specially rigged "double camera" that took two pictures at the exact same time from the approximate distance of your two eyes. We will not be doing this approach, we will only use one camera and take 2 subsequent photos. Therefore you are encouraged to do a still object instead of a person/pet.

    Friday, November 23, 2012

    Grade 11 Unit 3 Technical Test and Grade 12 Technical Manual

    Grade 11's Study Guide for the Unit 3 Test 

    Part One
    Lighting Techniques
    Review Reading from the Cindy Sherman Unit

    Part Two
    Photoshop Terms and Techniques
    Terms to know (You should understand how to manipulate/use each in Photoshop)
    Resisizing Canvas, Crop, Gaussian Blur, Layer Blending, Colour Cast, Levels/Histogram,
    Noise Reduction, Feather, Inverse

    Study the following buttons and menu options in Photoshop that are related to "Selection". You should also be able to to understand when they are the most effectively used and how to add and subtract from a selection.

    Selection Tools

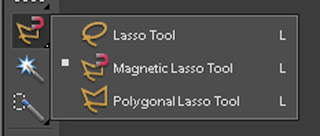
    Extended Options in Lasso Tool

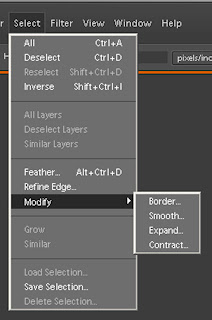
    Selection Menu options for working with your selection
    Grade 12's Technical Manual

    Grade Twelves, in place of a written test you will be required to put together a Technical Manual on creating a Cinemagraph and Lighting Techniques. Everything will be Posted Online as a single post entitled Technical Manual.

    Part One
    This will be like a step by step tutorial that will explain how to create a cinemagraph with tips from your own experience. This will be created online and posted to your blog. Include links to any websites sited as well as many example photographs. You may want to include screen captures of your photoshop screen like I have above.

    Required Elements:
    1. A brief Explaination of what a Cinemagraph is with your favorite examples as well as your best Cinemagraph.
    2.Written Instructions on how to create one. (Clear and concise)
    3. Images used for explaining your points.
    4. Links to external Websites if you refer to them.

    Part Two
    Using the photocopied Lighting Techniques package you were given during the Cindy Sherman Project create an "Infographic" in Photoshop informing people of essential Studio lighting techniques.

    Required Elements:
    Inverse Square Law
    Red Eye Reduction
    Bounce Flash
    Fill Flash
    Studio Lighting Arrangements illustrating  key lights, fill lights, accent lights(The diagrams showing where different lights go)
    Light Feathering

    What is and Infograhic? Check out the following examples, here, here and here.


    Wednesday, November 21, 2012

    Student Gallery


    Journal #5 Compositional Tools
    Lily White-Mitchell
    Lead-in Lines

    Abby Brinkman
    Lead-in Lines

    Journal #6 One Object 4 Ways

    Larissa Down


    Emery Vanderburgh
    One Object 4 Ways
    

    Journal 7

    Grade 11
    Black on Black White on White
    This is an exercise in getting perfect exposure. If you over or underexpose your image a black object on a black background will either disappear or look grey. Here is an example of an asssignment from a few years ago that was completed really well. Notice the use of contrasting textures used to make the image pop.
    
    Harley White
    Grade 12
    Ombre and or Colour Gradations
    (äm′brā′)

    adjective
    shaded or graduated in tone: said of a color

    This photo journal is a combination of two elements of design. Value and gradation as well as colour. The term Ombre has become popularly associated with the hair style but the term existed prior to this and refers to a gradual gradation of colour from one to another. You may actually have to arrange items for this assignment OR look for natuaral occurences or this effect. Examples of this are below:
    I took this one with my phone of old linoblocks from a printmaking assignment.

    Naturally occuring colour gradation "Getty Images"

    Constructed Ombre Image: Design Sponge

    Thursday, November 15, 2012

    Grade 11: The Photo Montage Assignment

    We will be learning how to blend several  photos into one image over the next week. We will be creating a scene in which a human subject will be repeated in the space in different poses. The end product (thank-you Grade 12's!) will look like this....


    Begin taking photos for this project right away! You only need a model, a camera and a tripod.. But be sure you take all the photos in one photoshoot to be sure that lighting doesn't change.

    Practice activity..
    In order to prepare you to do this I have a fun challenge for an in class activity. Look in the O drive under photography and open everything in the Spongebob folder in Photoshop. Take the real life Spongebob and Patrick and put them into Bikini Bottom. You may continue decorating the space with other elements like realistic sand texture or square pants for your sponge. Prizes for two categories: Most creative arrangement and most technically proficient. We have 3 in class days to work on this.

    Wednesday, November 14, 2012

    Grade 12 Project Cinemagraphs

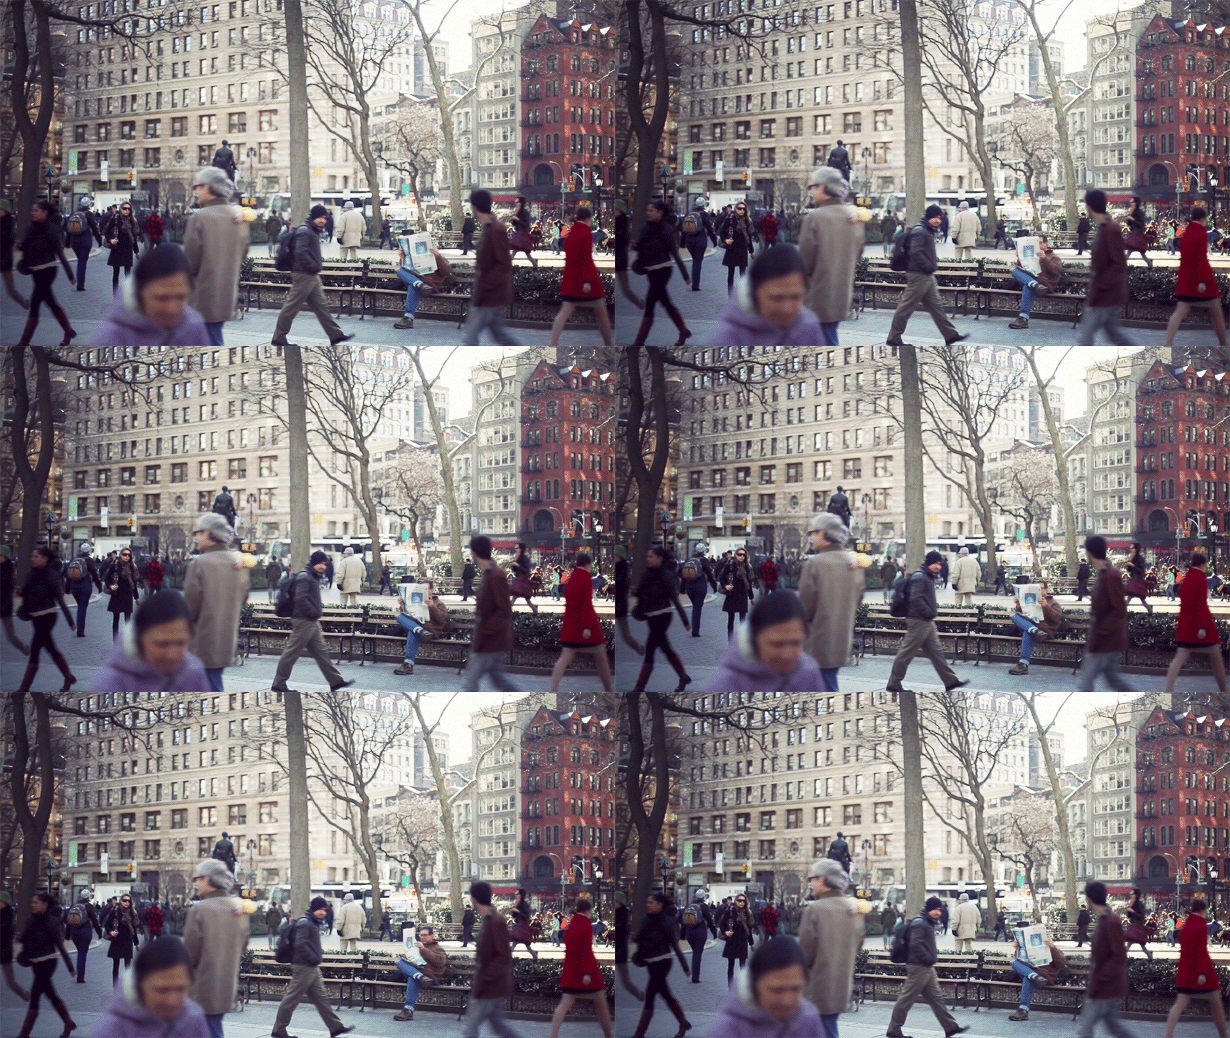
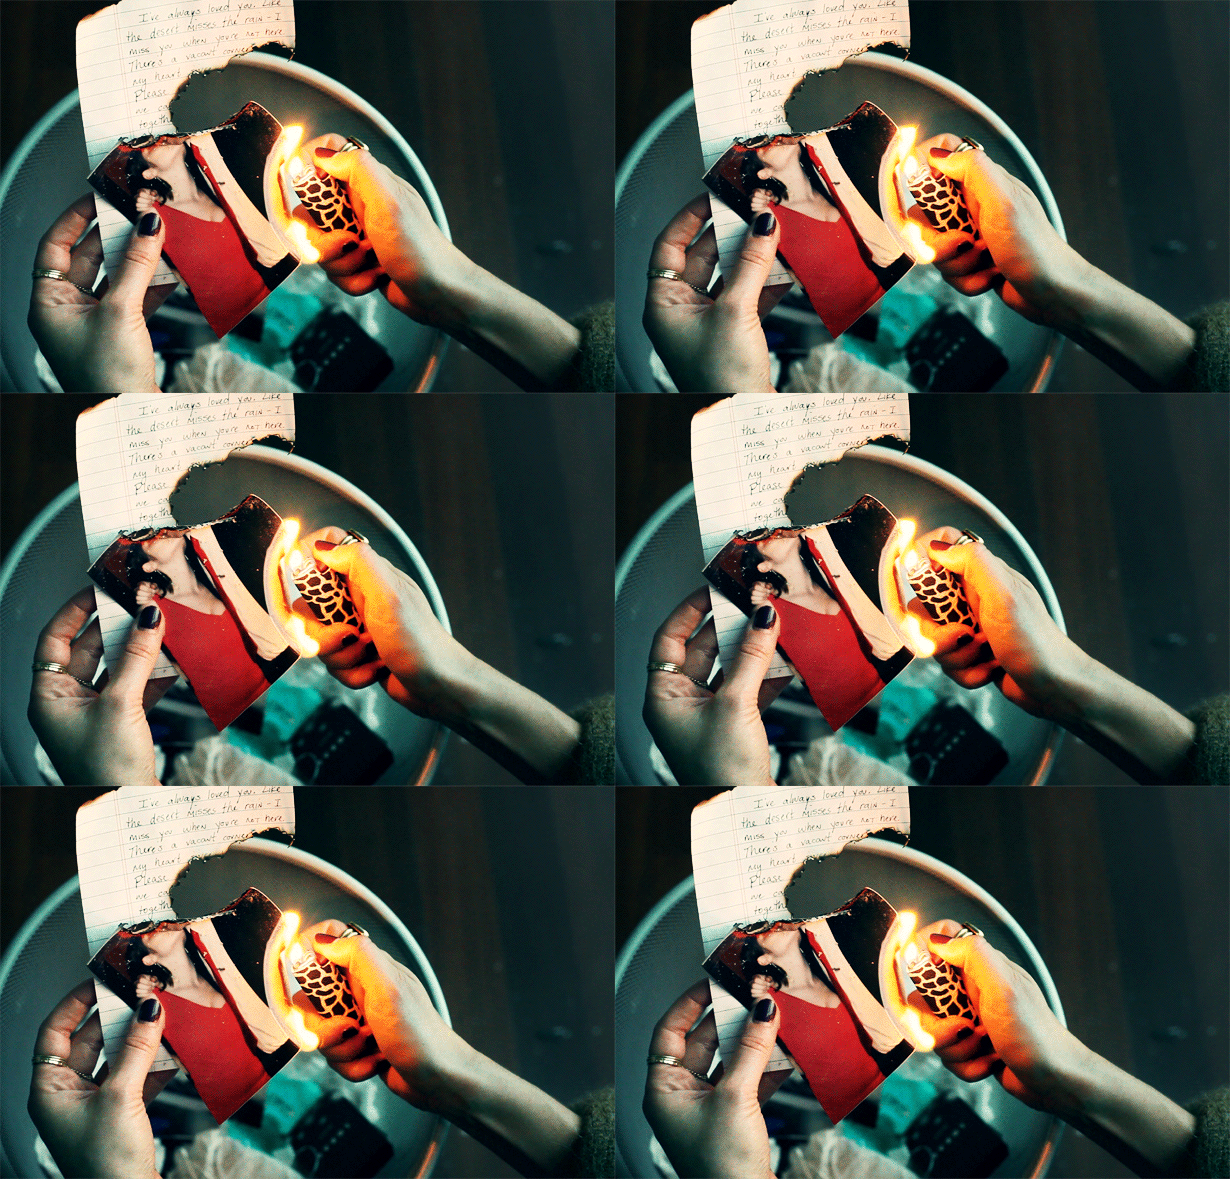
    What is a Cinemagraph? The difference between this a simple animated gif is subtle. The animated gif is simply a series of photos when played in rapid succession produce a moving image just like cartoon animation or claymation. The cinemagraph uses the same technology but animates only one element of the picture. What results is a strange mix of movement and a single frozen moment in time.
    All examples on this post were produced by fashion photographers Kevin Burg and Jaimie Beck on their Tumbler site, From Me To You.
    In this article they discuss the increasing popularity of this art form and what their work-flow is like.

    The estimated due date for this assignment is Friday Nov. 23rd

    Tuesday, November 13, 2012

    Journal #6

    OK! After a brief hiatus from Journals we are back! Let's get this one in on time!

    Grade 11
    One Object in Four Ways
    The premise of this Journal is fairly simple, take an object, any object and photograph it in four distinctly different ways. Things to alter might be angle, light source, setting, distance/zoom and focus. Or you can physically altering the object itself. For example if you are photographing a kiwi you may have a shot of the whole kiwi and then one as "slices". I will be assuming at this point you have mastered the technical aspects like clear focus and correct lighting so pay attention to your image quality, not just your object. Use our lesson on photoshop and put all four images on one "canvas" and submit as a single JPEG file.


    Grade 12
    Photograph Shadows
    I would like you to experiment further with light, specifically shadows falling on the surface of objects. Challenge yourself to find new and interesting ways to use a the shadow as part of your composition; to either created directed movement or to be the focal point itself.

    Thursday, November 8, 2012

    You are officially invited to the opening of the
    Cindy Sherman Project Exhibition
     Rodman Hall

    There will be refreshments (no open bar!!) provided and general hob-nobbery and schmoozing going on. Parents are encouraged to attend but if they cannot please discuss transportation with me. There will be some people speaking around 4:30-5:00 pm as well. Consider dressing up a bit because you may have pictures of you published in the Brock Study or possibly the newspaper.

    Follow this Link for directions
    (look on the 2nd page for a more detailed map)

    Monday, October 29, 2012

    Cindy Sherman Project: Shot Types

    Some shots are very formal (Notice both formal shots have the subject look at the camera):
    Full Body

    3/4 Shot
    (The Classic Portrait)

    And Some are much more informal:
    Alot of what determines how formal a portaitis has to do with body posture and gaze.


    Other example of shot type are long and close-up shots.
    Photo of Cindy Sherman  by Martin Schoeller


    EJP Photo